Cost per Square Foot

I get asked this question all the time: How much do your homes cost per square foot?

The short answer is, it really depends on what type of home you want to build! I like to use this analogy with cars because it seems easier for most people to understand: Let’s say we’re talking about buying an SUV made by Honda, Subaru, Toyota, Audi, or BMW. The “square footage” of these cars may all be about the same. They are all SUV’s equipped with 4 wheel drive and similar passenger capacity. But the price points, quality level and features will vary dramatically. We see huge differences in the “price per square foot” based on the manufacturer and option packages that are chosen. Even within the same brand, there can be huge differences in price depending on which option package you choose.

Price per square foot of homes is the same way. We could have two homes, both 2,500 square feet, one of which costs three times as much as the other based on it’s architecture and level of finish. Take the appliance package for example: On a home this size we could do a nice stainless steel appliance package for around $15,000. Or if customers would prefer a high end appliance package, they could choose to spend easily double or triple that amount. This is just one category of the project, but the concept applies to many areas (exterior finish, windows, doors, tile, hardwood, slab countertops, cabinets, etc.) where product selections can literally double or triple the cost.

So when people ask me how much our homes cost per square foot, I usually respond with, what type of home would you like to build? It’s not really possible to quote an accurate price until we know what the architecture and specifications will be. As a custom home builder I can build at many different price points depending on what my customers are looking for, and my goal is to help customers get the best value at whatever price point fits their budget. The trick is to get a good understanding about which areas people value the most, and work together to allocate the budget wisely for the most impact.

Differences in price points are largely driven by the choices made by the homeowners when designing plans – what size home and complexity of architecture, and the selections made for finish products. Recent projects that we’ve been working on have come in around $280-$365 per square foot (these homes have upgrades in a number of categories to varying degrees, and some of them are heavily upgraded in certain categories). It’s certainly possible build at lower (or higher) price points than these numbers.

Regardess of the finishes owners select, any home I build will have a strong structural frame, water tight exterior envelope, and quality products which exceed production built homes – these are areas where I feel it’s important to maintain a consistent level of quality, at any price point. But beyond that it is really up to the homeowner to decide what products and price points they choose to finish the home with. For more specific information on cost per square foot, please contact us to start a discussion about what type of architecture and finish level you’re interested in building!

Custom vs Production Building techniques

The terms ‘Custom’ and ‘Quality’ are overused in the home building industry. It seems like almost every builder out there calls themself a Custom / High Quality company, when in reality there are many different levels of quality. Customers may find this confusing, and it’s often hard to understand the differences unless you really dig in to the specifications for each category of construction.

Early on in my construction career I worked for a Production style builder, then later as I gained experience I became more aware of the problems associated with production building and got to a point where I just couldn’t stand it anymore. I’ve been building Quality homes ever since. What I found is that Production style homes might look ok at first, but they don’t age well. That “Contractor’s Grade” paint job might look OK for the first year, but after 3 years it looks terrible due to weathering, the paint is faded and cracking prematurely. This is just one example where the Production builder saves a few hundred dollars by purchasing cheaper materials, but what I’ve found is that this concept applies to ALL of the categories of construction. The Production builder’s mindset is: by saving a few hundred dollars per category, multiplied by many categories and many homes per year, that adds up to a significant amount of money. By doing this they can offer lower pricing per square foot for construction, but unfortunately the homeowner pays in the long run.

What does this mean for the homeowner? For example, a friend of mine owns a home that was built by a Production builder who decided to save money with roofing materials. Roofing products are typically supposed to last at least 30 years, but after only 10 years his entire roof had to be re-done. During a tough winter there were leaks all over the place, sheetrock damage on the inside of the home, water running inside the walls and warped hardwood floors. It was a real mess that ended up costing ten times what it would have cost to just install the roofing correctly in the first place. The production builder saved maybe $1000, my friend had to pay for an entire new roof. Check out my post on Ice and Water Shield for more information about roofing systems.

This question of what is quality seems to come up all the time. Over the next few months I’ll be writing about the differences in quality between production and custom home building. Broken down by category it’s quite interesting to see what choices are being made by builders. I want my customers to have homes that perform as they should without the long term problems that come back to haunt Production homes. I don’t want warranty issues and product failures coming up years down the road, it’s just bad business to operate that way. Our homes cost a little more, but they are built correctly and will hold up over the long run!

What makes a great set of plans?

Getting ready to start building soon!

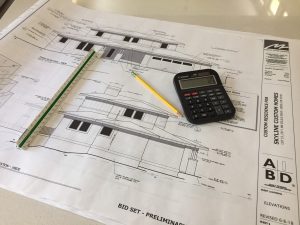
While working with my plan designer on blueprints for a new custom home, I spent a considerable amount of time thinking about what characteristics make a really great set of plans.  Of course, every home is going to be different based on the neighborhood, needs of the owners, and individual site conditions that come into play.  But just for example, let’s say we’re designing a mid-range custom home for a family of four.

First we want to make sure we have the right allocation of rooms and square footage.  A 2,600 square foot, 3 bedroom, 2 1/2 bath seems to be a highly desirable configuration for most families.  Additional spaces to consider are an office, bonus room, and additional storage spaces. I find that those “overflow” spaces are really important in making a home comfortable. 

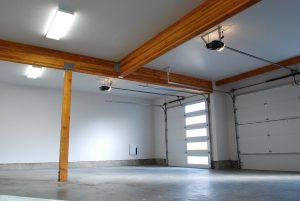
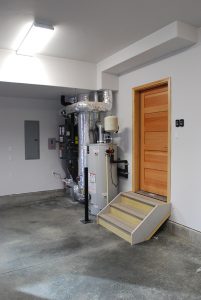
Here in Central Oregon, we tend to have a lot of outdoor gear – bikes, skis, paddle boards, and all kinds of other stuff depending on what people are interested in.  I’m a big fan of oversized garages for several reasons – they allow room to store all of the things that you don’t necessarily want to have inside the house, but you may not want to leave outdoors either.  I see a lot of homes with standard sized garages, that are so packed full of stuff that they are no longer useable for parking.  That’s not too much fun when it’s 20 degrees out and you’re scraping ice off your car every morning during the Winter!  With any new home I’m designing, we like to incorporate 3-4′ side wings on the garage allow room for shelves, hanging up bikes, etc. and will still allow you park cars inside the garage where they’re supposed to be.  
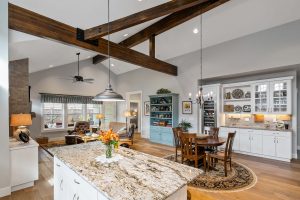
Over the last 14 years of home building, I’ve also started developing opinions on how big rooms need to be to work properly.  18’x18′ for living rooms, 15’x15′ for master bedrooms, 12’x12′ for guest bedrooms, 11×11′ for offices, 4′ wide pathways for stairs, hallways, etc.  Of course, these are not set in stone but I find that squeezing below these minimum dimensions really starts to feel cramped.

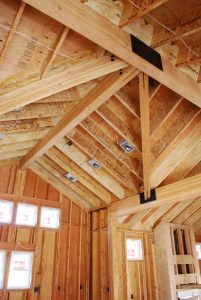
Ceiling heights are important too- I like to go a minimum of 9′ tall (as opposed to the standard 8′).  It doesn’t cost that much more, but really feels more spacious.  Incorporating some higher/vaulted ceilings is great when possible, along with taller windows & skylights to give the home that bright welcoming feeling we’re looking for.  
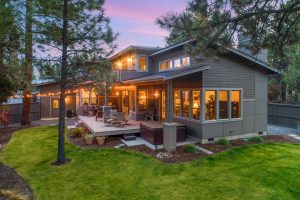
We also like to spend time considering the building site, any view opportunities that are available, and ways to incorporate outdoor living spaces that fit specifically for the home site.
If you’re in the early stages of home design, please feel free to contact us for input on your construction plans!

Kiln Dried Lumber

With almost all building materials, there are different levels of quality and price based on what products you select. One of the most important in our opinion is framing lumber. This is the structure of the home, that everything else is attached to and it’s important for it to be strong and stable!
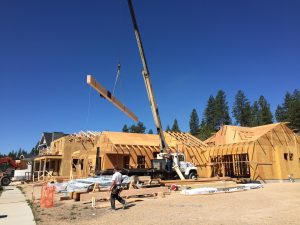
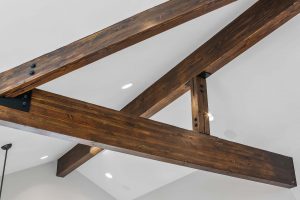
When trees are first cut they have quite a bit of moisture in the wood. As builders we call this “Green” Lumber – for example 2×4’s that were just milled from a recently cut tree. Over time as the wood dries out, it tends to shrink a little (picture a sponge full of water, as it dries out it gets smaller). Sometimes wood can take as long as a year to dry completely. The problem with using green lumber to frame houses is when green boards are cut to length, they haven’t had enough time to dry out and don’t stay quite the same length after they are put into place.

This beam is over 30 feet long!

Depending on the grain of the wood, it may also twist or curve as harder & softer parts of wood grain behave differently when they dry. So as the framing lumber shrinks in place, the structure of the home shifts and settles slightly. This may not be much, sometimes only 1/8″, but the movement leads to things like cracks in drywall, nail pops, squeaky floors, or walls that aren’t very straight.

The good news is, better grades of lumber are available. A builder can choose to use “Kiln Dried Lumber” that has essentially been baked dry by circulating heated air in a controlled environment. This extra step in the milling process costs a little more, but provides a much more stable material than using wet, green lumber. Skyline Custom Homes uses Kiln Dried Lumber for all of our new construction projects. It allows us to have more accurate carpentry work – straighter walls, less squeaky floors, less drywall cracks, and a more stable structure than our competitors. It’s another example of our overall philosophy about home building: choosing higher quality for our homeowners so they have a well built home!
Please Contact Us with any questions about building materials and techniques.

Ice And Water Shield

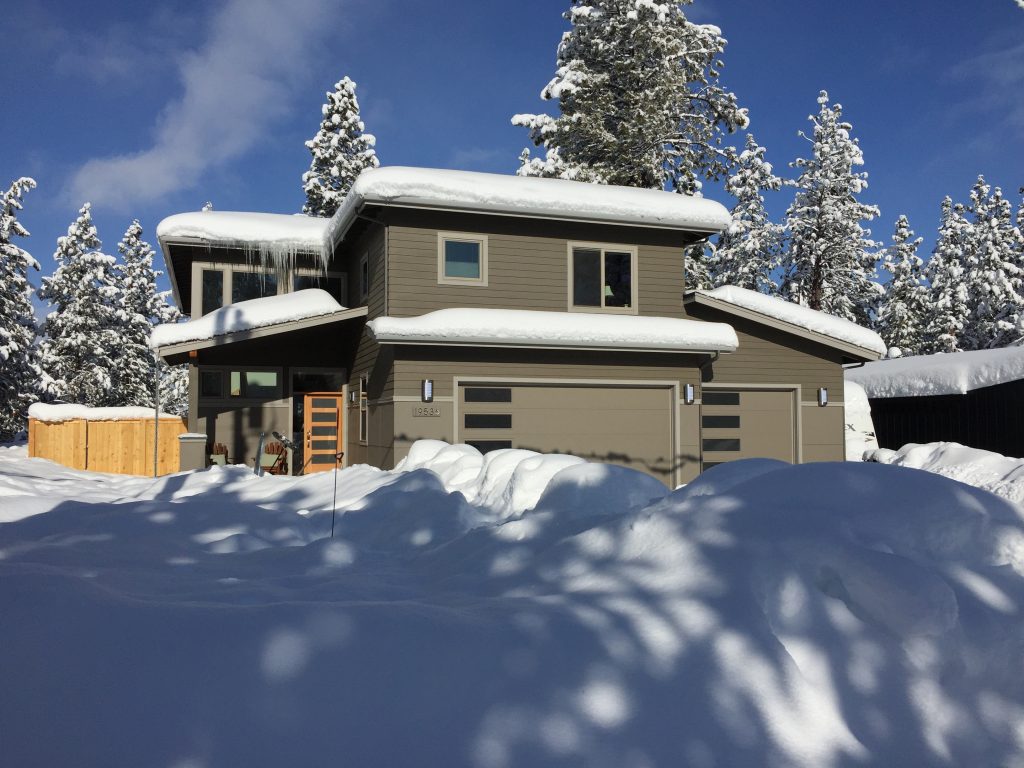
The home pictured here survived the Winter of 2017 with no roof leaks!

With the record snowfall Winter we had in 2017 here in Central Oregon, many homeowners were surprised to see how many leaks due to ice dams and roof failures happened all over town. As a custom home builder I had quite a few phone calls from people asking for information about what to do when heavy snow loading became an issue. Some homes seemed to be doing fine, while others started having real problems. Why was this happening? Aren’t all roofing systems designed to handle snow load around here? As the snow continued to pile up, the quality differences in roof construction around town became more and more apparent.

Personally I have been a fan of “ice and water shield” roofing underlayment for many years. Skyline Custom Homes installs this product on all of our new construction projects, whether customers request it specifically or not. What does ice and water shield do? It’s an adhesive backed roofing underlayment product, that sticks to plywood roof sheeting and prevents water from getting into attic spaces in the event of an ice dam. Over the years many low cost / low quality builders have chosen to save money by not installing this product, instead just using standard roofing underlayment. Standard roofing underlayment works fine most of the time, the problem is it won’t handle water flow that occurs when melting snow runs down a roof and hits an ice dam. The low quality builder saves money in the short term, but in the long term when we have a big snow year it can be a real problem for homeowners having to deal with water leakage issues. As a standard practice, we install ice and water shield at a minimum 4-6′ up all roof eaves and overhangs, valleys, and sidewalls where water flow may be encountered. For lower pitch roofs, we will often cover the entire roof area with this product and will pay special attention to areas like side-wall flashings and valleys where water intrusion may be a concern.  It costs a little more, but having that extra layer of protection provides peace of mind and savings over the long term!

Please Contact Us if you would like more information on roofing systems for new homes.


Contract Types – Fixed Price or Cost Plus?

Fixed Price, or Cost Plus? Many new home buyers are surprised to learn that construction contracts are not all formatted the same way. This can be somewhat confusing if you’re not already familiar with these contract formats, and you will hear builders make great arguments as to why their preferred contract format is “the best”. Which way do I think is the best? That’s not an easy answer, except to say in my opinion it depends on the size and scope of the project. In my experience large custom projects tend to work best with Cost Plus contracts, while more standard homes and small remodels can work better as Fixed Price contracts.

Let’s start with Fixed Price: A set of plans and specifications is agreed on between the customer and builder. The builder then gathers pricing from their subcontractors and suppliers. After adding up all the costs and applying a profit margin, the builder quotes a “Fixed Price” which will not change unless the customer decides to change the plans or specifications. For smaller, simpler projects like standard homes and small remodels, there aren’t as many details to figure out so it’s feasible for the builder to gather all the numbers and be able to feel confident in quoting a price that won’t change. That said, if the customer decides to upgrade or downgrade their selections, price adjustments will of course need to be made in the form of change orders.

Cost Plus contracts work a little differently. A set of plans and specifications will still be needed to generate a preliminary cost estimate, but in this case the specifications don’t need to be as detailed. Why not as detailed? Because with a Cost Plus contract, the customer agrees to pay the amount of all the subcontractor & supplier invoices, plus the builder’s profit margin. This allows builders and their customers to get the project started and figure out the specifications as they go. Imagine how long it would take to pick out every little detail for a large custom home… Both the builder and the customer usually get overwhelmed by the amount of time this would take to do before the project can begin, so it’s often more realistic to use the Cost Plus format and make these decisions over the course of the project. Because many of the selections have not been made at the starting point of the project, the builder and customer will typically establish “allowances” for what they think will be a reasonable amount of money for each category of the project. The allowances are adjusted by change orders when final selections are made.

There are other nuances of these two contract types that could take pages to text to explain. Often times our recommendation is to look at each project individually and come to a mutual agreement on which type of contract makes the most sense. If you would like more information on contract types, or have a project you would like to discuss please contact us